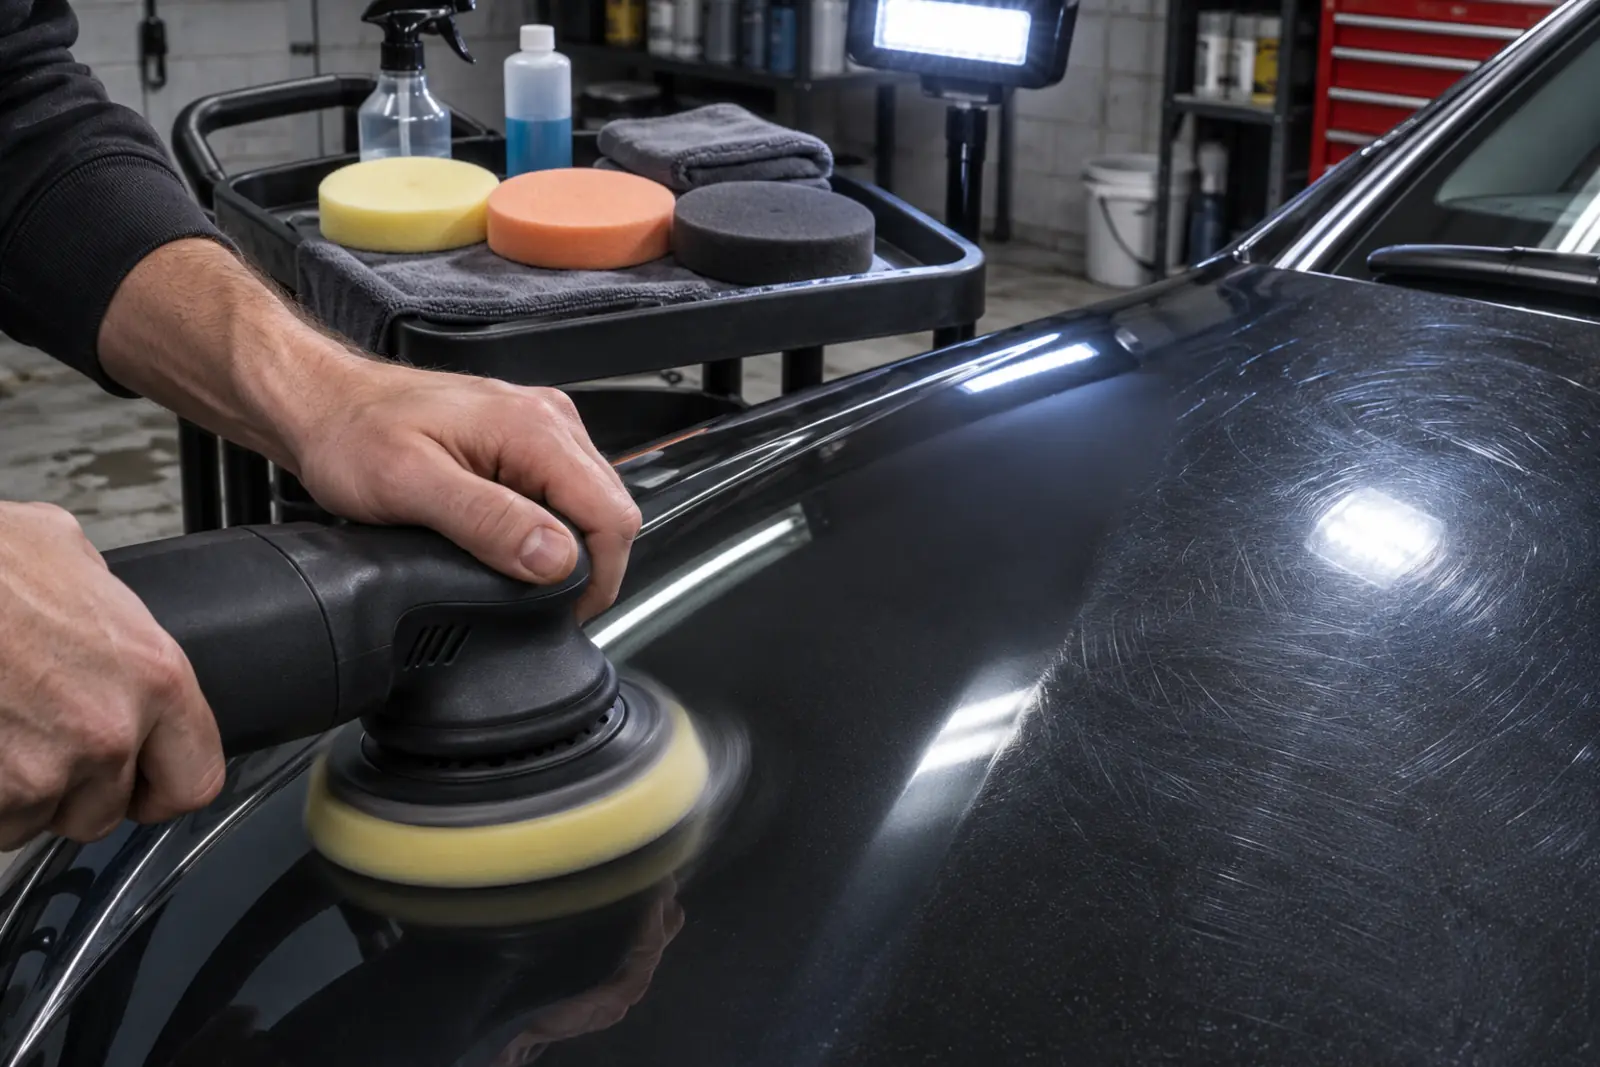
Paint correction is one of the most misunderstood services in auto detailing, partly because the terminology is not standardized across the industry. One detailer's Stage 2 might be another shop's one-step correction. Despite that inconsistency, the underlying logic of the stage system is sound and worth understanding before you evaluate a quote or decide what your car actually needs. This guide explains what Stage 1, Stage 2, and Stage 3 paint correction involve, what each stage typically costs in the Kansas City market, and how to identify which level of work your paint genuinely requires.
Why Detailers Use a Stage System
Paint correction removes or diminishes defects in a car's clear coat - the transparent protective layer that sits on top of the color paint. Those defects range from microscopic swirl marks left by improper washing to deep scratches that require significant cutting to level out. The more severe the defects, the more aggressive the abrasive compound needed, and the more polishing passes required to refine the surface afterward.
The stage system is shorthand for communicating how many distinct cutting and polishing steps are involved. A single-step correction (Stage 1) uses one product to both cut lightly and refine the surface in a single pass. A two-step correction (Stage 2) adds a heavier cutting compound before the finishing polish. A three-step or multi-step correction (Stage 3) introduces an even more aggressive initial cut, sometimes followed by intermediate polishing stages, before the final refining pass.
More steps mean more time, more product, and more labor - which is why pricing rises significantly from one stage to the next. It is worth noting that the stage numbers do not refer to passes of the machine over the paint; a single polishing stage might involve multiple passes at different speeds or pad types. The stages refer to the number of distinct abrasive steps in the overall process.
One critical caveat applies to all three stages: the system assumes the car has sufficient clear coat remaining to safely remove material. Clear coat has finite thickness, typically around 100 to 150 microns on the paint surface of a factory-finished vehicle, though this varies by make, model, and production era. A reputable Kansas City detailer will use a paint depth gauge to measure your clear coat before recommending any correction work. If the readings are too low, further cutting would risk burning through the clear coat entirely - a problem that cannot be repaired without a full respray. The full paint correction guide for Kansas City covers the inspection process and cost factors at a broader level.
Stage 1 Paint Correction: Single-Pass Polish
What It Addresses
Stage 1 correction uses a single product - usually a light cutting polish or an all-in-one compound - applied with a machine polisher. The goal is to remove light surface defects without introducing significant new haze that would then require a separate refinement step. The product is formulated to both cut and finish in one pass, which keeps the process efficient on paint that does not need heavy work.
The types of defects Stage 1 can effectively address include:
- Light swirl marks and spider webbing caused by automatic car washes or improper hand washing technique
- Minor water spot etching that has not penetrated deeply into the clear coat
- Light hologramming left by previous poor machine polishing
- Mild surface oxidation that has dulled the paint's gloss without deep pitting or color degradation
- Fine random isolated scratches (RIDS) that sit near the top of the clear coat layer
A well-executed Stage 1 on a car with mainly light defects can deliver a noticeable improvement in gloss and clarity. Many newer vehicles or cars that have been maintained reasonably well fall into this category. If the car has been kept in a garage in Overland Park or Leawood and washed carefully, Stage 1 may be all that is needed to restore the paint before applying a ceramic coating or sealant.
What Stage 1 Will Not Fix
Stage 1 is not aggressive enough to remove deeper scratches or moderate-to-heavy swirl marring. It also cannot address paint chips that have broken through the color coat, rock strike damage, or oxidation that has progressed into the paint layer itself. Attempting to address those problems with a Stage 1 product will either leave the defects untouched or, in the case of very light products, temporarily mask them through filler chemistry rather than through true correction. That temporary improvement fades as the filler wears off, and the original defects return.
Typical Cost in Kansas City
Stage 1 paint correction in Kansas City typically runs from roughly $150 to $400 for a standard passenger car. Larger vehicles - full-size trucks, three-row SUVs, and vans - generally run $250 to $500 or more for Stage 1, since surface area and panel access add time. These are general market ranges; actual quotes depend on the detailer's hourly rate, the specific products used, and the condition of the paint when it arrives.
Some shops offer a one-step correction as a package item bundled with ceramic coating installation. In those cases, the Stage 1 work is priced as part of the total package rather than as a standalone service, and the bundled rate may be more favorable than booking each separately. Always ask a detailer whether the correction work is included in a coating package price or is an add-on billed separately.
Stage 2 Paint Correction: Compound Plus Polish
What the Two Steps Mean
Stage 2 correction separates the cutting and refining work into two distinct passes. The first pass uses a more aggressive compound - often a machine cutting compound applied with a cutting or medium pad - to remove defects that a finishing polish alone cannot reach. The second pass uses a lighter finishing polish to remove the marring and micro-scratches left by the compound, leaving the surface with the high gloss most owners are looking for.
This two-step approach is significantly more effective than Stage 1 on cars with moderate paint defects. It is also the most common type of correction sold in the Kansas City market, since it represents the practical middle ground between a quick polish and a full multi-day correction process.
What It Addresses
Stage 2 is appropriate for:
- Moderate swirl marring - the kind clearly visible in direct sunlight or under a shop light even if the paint looks acceptable in a parking lot
- Water spot etching that has bitten slightly deeper into the clear coat, particularly common on vehicles that sit outside in areas with hard tap water across much of the KC metro
- Light-to-moderate scratches that stop short of the color layer
- Moderate surface oxidation, common on vehicles that have spent years in the sun without adequate paint protection
- Buffer trails or holograms left by an aggressive previous machine polish that was never followed by a proper finishing step
A car that has lived its life parked outside in the Kansas City suburbs and gone through automatic car washes regularly over three or four years is a classic Stage 2 candidate. The paint often looks acceptable from ten feet away but tells a different story under a detailing light or in direct afternoon sun, where the swirl marring catches the light and creates a web-like haze across the panels.
Typical Cost in Kansas City
Stage 2 correction typically runs $350 to $700 for a standard passenger car in the Kansas City market. For larger vehicles - pickup trucks like the F-150 or Ram 1500, or three-row SUVs - expect $500 to $900 depending on the shop and the paint's condition. Heavily marred or sun-faded paint takes more product and more passes, pushing the price toward the higher end of those ranges. Prices vary between detailers based on experience level, equipment quality, and business overhead.
A mobile detailer working from a van may price Stage 2 differently than a shop with a climate-controlled bay and professional lighting setup. Neither is automatically better; the differences lie in how they work and what their setup allows them to achieve. See the Kansas City paint correction guide for a broader breakdown of how detailer type, vehicle size, and paint condition all factor into final pricing.
Stage 3 Paint Correction: Heavy Cut and Multi-Step Refinement
What Stage 3 Actually Involves
Stage 3 is not a single-product, single-pass process. It describes a multi-step correction that starts with a heavy or aggressive cutting compound and works down through intermediate and finishing stages until the paint is as defect-free as the remaining clear coat allows. In practice, Stage 3 work might involve three or more distinct polishing stages, each using progressively less aggressive abrasives and progressively softer pads.
Some detailers include a wet sanding step before machine polishing for the most severe cases - for example, a car with deep buffer trails from a dealership prep job, or severe single-direction marring from an automatic car wash belt. The wet sanding levels the surface enough that the compound stage can then work effectively without removing an excessive amount of clear coat in pursuit of the same result. Not every Stage 3 job requires wet sanding, but on the worst paint the option exists.
Stage 3 is time-intensive. A typical Stage 3 correction on a mid-size car can take 12 to 20 hours of hands-on labor, and on a full-size truck or large SUV the number can exceed 25 hours. This is why Stage 3 is priced substantially higher than the other stages and why it is typically quoted as a custom job rather than a fixed menu item.
When Stage 3 Is Appropriate
Stage 3 is not for every car. The cases where it makes sense include:
- Vehicles with heavy swirl marring, deep marring patterns, or significant scratching that Stage 2 compounds cannot remove in a reasonable number of passes
- Paint with severe oxidation that has gone beyond surface dulling - for example, a vehicle that sat outdoors for several Kansas City summers with no sealant protection, developing the chalky, faded appearance common on red and black paints
- High-value or enthusiast vehicles where the owner wants the paint as close to flawless as the remaining clear coat can deliver
- Show car preparation, where achieving a reflection like a mirror matters more than budget considerations
- Pre-PPF prep on a vehicle where the film installer requires a fully corrected surface, since paint protection film locks in whatever defects exist underneath it at the time of installation
Stage 3 is also worth considering when a vehicle is going to receive a high-tier ceramic coating. Because ceramic coatings are highly glossy and optically clarifying, they amplify whatever is already present in the paint - both the good gloss and any remaining defects. If the goal is a truly show-worthy result under a coating, the correction work needs to get the paint to that level first.
Typical Cost in Kansas City
Stage 3 correction in Kansas City generally starts around $600 to $800 for a small car in moderately severe condition and can run $1,200 to $2,000 or more for a large vehicle with heavily damaged paint. For extreme cases requiring wet sanding in addition to multi-step machine polishing, some detailers will quote even higher, since the labor hours alone justify it.
Pricing this work accurately requires an in-person inspection. Clear coat thickness readings, lighting inspection of the specific defect patterns, and an assessment of how the paint responds to test spots are all part of the process a thorough detailer will conduct before quoting. Any Stage 3 estimate given over the phone without seeing the car should be treated as preliminary at best - and possibly unreliable.
How to Tell Which Stage Your Car Actually Needs
The honest answer is that you need to look at the paint under proper lighting conditions. Swirl marks and marring that are invisible in overcast daylight can be clearly visible under a bright single-point light source or in direct sun at a low angle. The severity of what you see under those conditions tells you roughly where on the stage spectrum your car falls.
Here is a rough guide to what you might observe and what it suggests:
- Light holographic swirls visible mainly in direct sun or under a detailing light, paint otherwise glossy and deep: Stage 1 is likely sufficient
- Moderate swirling visible in most light conditions, some fine scratches, possibly dull areas on horizontal panels like the hood and roof: Stage 2 is usually the right choice
- Heavy swirling and scratching visible in ambient light, areas of oxidation or color fade, significant below-surface scratches: Stage 3 or close to it
- Deep gouges, chips through the color coat, or large panels with paint peeling or cracking: These are beyond the scope of polishing and require touch-up paint, spot respray, or professional bodywork
Paint depth gauge readings add critical context to that visual assessment. If the clear coat is already on the thinner side - say below 80 to 90 microns on a panel - an aggressive Stage 3 cut could remove enough material to create thin spots that cannot be safely corrected again in the future without repainting. A detailer who measures paint thickness before quoting is protecting both you and the paint. If a shop does not own a paint depth gauge or declines to use one, that is worth noting before you proceed.
Kansas City's climate adds its own variables to this evaluation. Road salt exposure from winter driving accelerates clear coat degradation, particularly on lower door panels, rockers, and bumper corners. The combination of hot humid summers and cold winters creates thermal cycling that stresses paint over time. The high UV load of Missouri summers hits darker colors especially hard - black, dark blue, and dark red paints fade and oxidize noticeably faster than white or silver. If your car has spent several years as a daily driver in the KC metro without a protective coating, the paint may have aged faster than its mileage would suggest, making Stage 2 or Stage 3 more likely than it would be for the same car kept in a garage. The guide to paint oxidation in Kansas City covers this progression and what it looks like at each stage of deterioration.
Questions to Ask a Kansas City Detailer Before Booking
Choosing the right detailer for paint correction work is as important as knowing which stage the car needs. These questions help distinguish shops that do correction work properly from those that treat it as a commodity upsell.
Do you use a paint depth gauge before starting correction work?
The answer should be yes. A detailer who starts cutting without measuring clear coat thickness is taking an unnecessary risk with the paint. If the answer is no, ask why not. Some detailers argue experience tells them enough, but a gauge is inexpensive and the data it provides is objective - there is no good reason to skip it on correction work.
Can I see a test spot before you proceed with the full car?
A test spot involves applying a compound or polish to a small inconspicuous panel section to show the expected correction result before committing to the full vehicle. Reputable detailers do this to set expectations accurately and to verify the product and pad combination is appropriate for this specific paint. If a shop declines, ask for the reason.
What products and machine types do you use?
Dual-action (DA) polishers are more forgiving and are appropriate for most correction work. Rotary polishers cut more aggressively but require more skill to use without burning through clear coat or introducing holograms. Some Stage 3 work legitimately calls for a rotary, but Stage 1 and many Stage 2 jobs can be completed with a DA. Neither machine is inherently superior - the question is whether the detailer knows when and how to use each tool appropriately.
How many hours are you estimating for the correction?
Time tells you a lot about the depth of work. A claimed Stage 2 on a full-size sedan that only takes three hours is either very mild work or rushed work. Stage 2 on an average sedan generally takes six to ten hours when done thoroughly. Stage 3 on a large vehicle can legitimately take two full working days. If the quoted hours seem low for the stated stage, it is worth asking how the detailer defines what they are doing and what they expect to achieve.
Is the correction work priced separately from the coating installation?
If you are pairing paint correction with a ceramic coating, make sure you understand what portion of the invoice covers the correction versus the coating product and its application. A quote that simply says "ceramic coating package" without specifying the correction level makes it difficult to compare across shops or to understand what level of paint preparation you are actually receiving.
How Paint Correction Fits With Ceramic Coating and PPF
Paint correction is almost always a prerequisite for high-quality ceramic coating and paint protection film installation - but the stage required depends on the product going on top and the owner's expectations for the final result.
For ceramic coating, the goal is a clean, smooth surface that the coating can bond to without encapsulating existing defects. Because ceramic coatings are highly glossy and optically clarifying, they will make both the good and bad features of the paint more visible after application. A swirl-free Stage 2 correction underneath a ceramic coating will produce a dramatically better visual result than applying coating over untouched defects. Stage 1 is often sufficient for newer cars or well-maintained vehicles, while Stage 2 is the more common recommendation before mid-tier coatings. Stage 3 is typically reserved for show cars, collector vehicles, or owners who specify they want the absolute best result regardless of the additional labor cost.
For paint protection film, correction is even more critical. PPF is an optically clear film that visually conforms to the surface beneath it. Any swirl marks, scratches, or defects in the paint will remain visible through the film after installation, particularly under PPF products with a high-gloss finish. Many PPF installers require that the paint be corrected before they will apply the film, and some specify minimum correction requirements as part of their warranty terms. The sequence is non-negotiable: correction always comes before any coating or film is applied. Attempting to polish over a cured ceramic coating degrades it, and polishing under installed PPF is not possible without removing the film first.
One more practical point: paint correction does not last indefinitely on its own. Without a protective layer on top - whether that is a traditional carnauba wax, a paint sealant, a ceramic coating, or PPF - the corrected surface will accumulate new defects over time. How quickly depends on washing habits, storage conditions, and daily use. If the goal is to maintain the corrected result for years rather than months, applying a durable protective layer immediately after correction is the logical next step. The PPF vs. ceramic coating guide covers the decision between those two protection options in detail, including which makes more sense for different vehicle types and budgets in the Kansas City market.
Frequently Asked Questions
What is the difference between a Stage 1 and Stage 2 paint correction?
Stage 1 uses a single light polish in one pass, targeting minor swirls, light water spots, and superficial surface haze. Stage 2 adds a more aggressive cutting compound as a first step, followed by a finishing polish to refine the surface - making it effective on moderate swirls, deeper water spot etching, and light scratches that Stage 1 cannot remove. Stage 2 takes roughly twice the time and costs proportionally more.
How much does Stage 2 paint correction cost in Kansas City?
Stage 2 correction on a standard passenger car typically runs between $350 and $700 in the Kansas City area, depending on the detailer and the condition of the paint. Larger vehicles like trucks and SUVs generally cost $500 to $900. Exact pricing requires an in-person inspection because paint condition, vehicle size, and panel accessibility all affect how long the job takes. Verify current pricing directly with any detailer you are considering, as labor rates in the market change over time.
Is Stage 3 paint correction worth it?
Stage 3 is worth it when the car has heavy marring, significant oxidation, or deep scratches that lower stages cannot address - and when the goal is a truly high-gloss, defect-minimized result. It is not the right call on cars with thin or compromised clear coat, or on daily drivers whose paint will accumulate new swirls quickly without a durable protective layer applied afterward. The investment makes the most sense on high-value vehicles, collector cars, or any car going under a premium ceramic coating or full PPF installation.
Can paint correction fix deep scratches that you can feel with your fingernail?
No. If a scratch is deep enough to feel by dragging a fingernail across the panel, it has likely penetrated through the clear coat into the color layer or even the primer. Machine polishing removes material from the top of the clear coat and cannot fill in a scratch that goes below it. Those defects require touch-up paint, spot blending, or bodywork. A paint depth gauge reading and in-person inspection will identify which scratches fall into this category before any work begins.
Does paint correction remove the clear coat?
Yes, in a small and controlled way. Every pass of an abrasive compound removes a thin layer of clear coat, which is how surface defects are leveled out. A well-executed correction removes the minimum amount necessary to achieve the result. This is why paint depth gauge measurements matter: if the clear coat is already thin from age, sun exposure, or prior polishing work, there may not be enough material remaining for a safe correction. A thorough detailer will measure first and tell you honestly whether the paint can handle the work.
When is the best time of year to get paint correction in Kansas City?
Spring is the most practical window - after road salt season ends and before the peak UV months of summer. Correction done in spring can be followed immediately by a ceramic coating or sealant that then protects the paint through summer heat and the following winter. Fall works well too if you want protection in place before the first salt exposure of the season. Avoid scheduling correction right before a winter road trip or without decontaminating the paint first after heavy salt exposure, since embedded iron and salt particles need to be removed before any polishing begins.